Quick Start Guide
This guide will get you started fast without trying to read about every feature packed into GigLights.
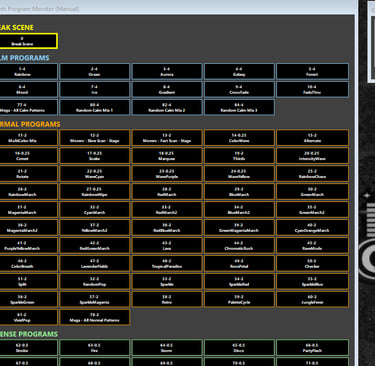
After GigLights has been installed, bring it up by going to your windows menu and finding it in the menu or you should be able to search for it in the search bar at the bottom of your screen. Once found, bring it up and you will get a screen like this...
GigLights is available for purchase at the Microsoft Store. Click this link to go to the store.
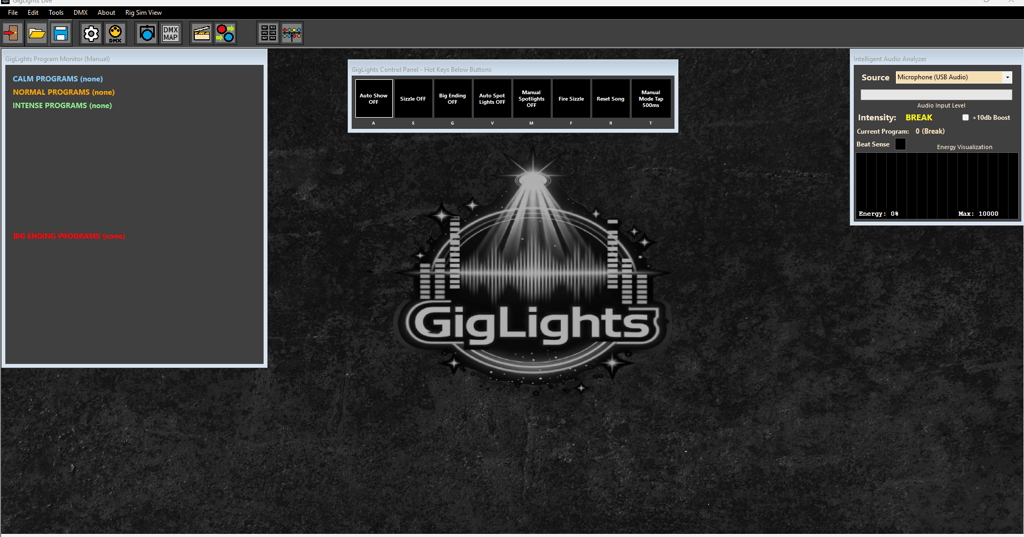
The above image is the blank app with no scenes or chases programmed. I can't give you preprogrammed scenes yet until I know what fixtures you have and how many. That comes next. You can resize the windows to be larger by dragging them where you want them and resizing them by dragging thier edges (except for the Intelligent Audio Analyzer,... it's size is fixed).
Step 1. Install GigLights
*** When you start the program, Windows is going to ask if GigLights can use the microphone. Tell it YES or Giglights cannot do an Auto Show.
Step 1a. Plan Your Layout Now
Before we go any further, you need to know where your fixtures are going to be placed and how you want them setup. It's easier to do this now than try and do it after the software has configured your lights. Do you have moving head fixtures? Do you have standard RGB flood fixture? Where are they going to be placed? Making a plan now will save you tons of time.
My lights are setup with two light trees, which are placed right by the PA speakers. Each tree has 4 RGB Flood Lights on them pointing at the band. I also use 10 more of the same RGB flood fixtures across the back pointing at the floor in front of the band. You don't want them shining in people's eyes all night so i point them down toward the floor in front of the band. I also have a handful of smaller moving head fixtures but you don't need to have any for a decent light show.
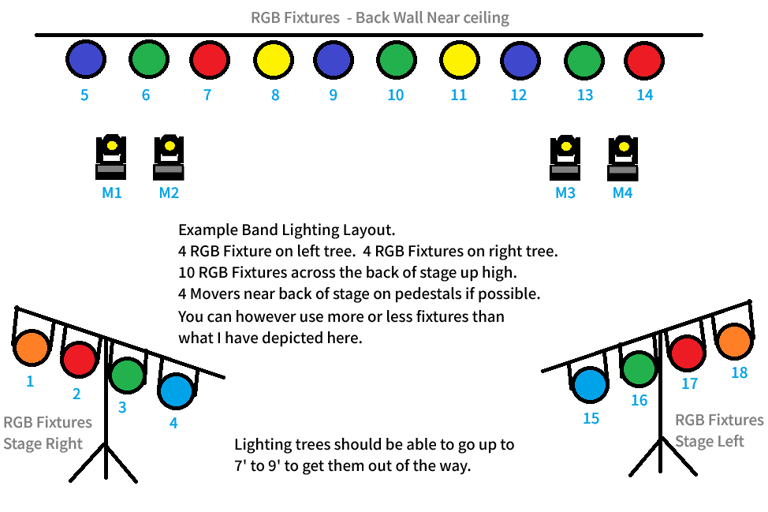
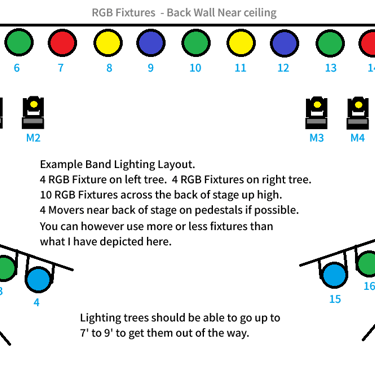
The diagram above shows a fairly simple band lighting setup. You don't have to have this many lights. For the back, I wouldn't go less than 4 fixtures across the back. You could probably get away with just 2 RGB fixtures on each light tree if they are decent bright lights.
Having a diagram like this, even if hand scribbled, makes it a lot easier to configure GigLights from the start. Having a plan makes setup a breeze. Firgure out how many lights you have then arrange them into a plan.
Step 2. Add Your Fixtures
If you have the manual that came with your lights, this should be really easy. If not, we may have to find your fixture's info.
If you have the manual, get it out and bring up the Fixture Manager. Click this button...

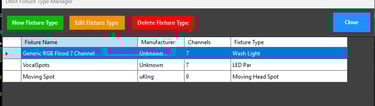

You now have the fixture manager open. To add a new fixture type, click "New Fixture Type" button.
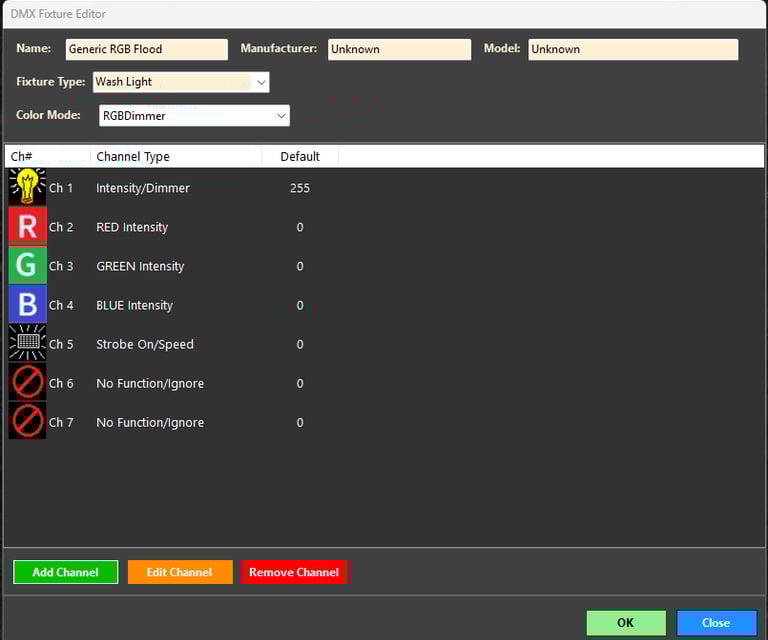
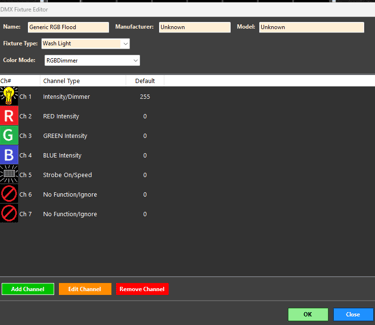
Give it a name like "Generic RGB Fixture" or whatever you want to call it. You don't really need manufacturer or model if you don't want to enter it. Select the fixture type (most will be Wash Light). Select the color mode. If it's just a basic RGB light, choose RGB. If your light has a dimmer or intensity channel, choose RGBDimmer. Choose others if they apply other than mentioned.
Start adding channels. As you can see, my lights have a intensity channel as the first channel. You can set the default value to 255 for max intesity and it will just use the color channels for color levels. Add and select the channel types until you have all channels accounted for. Notice on channels 6 and 7 above, I selected no function. This is fine since these channels do weird auto sound and special effects and I don't want to use them so I just selected "No Function" so GigLights ignores them. You have to make sure all of your channels are accounted for so the next step, the DMX map, knows how to address them. Once all channels are accounted for, click save.
Keep adding new fixture types until all of your fixture types are accounted for. If you have 10 of one type of fixture, you only need one fixture type for them. The DMX map will map them into the addresses they need to be to get 10 separate lights next.
Step 3. Add your fixtures to the DMX Map
This is where you map all of your fixtures so GigLights knows how to address them. Bring up the DMX Map editor.
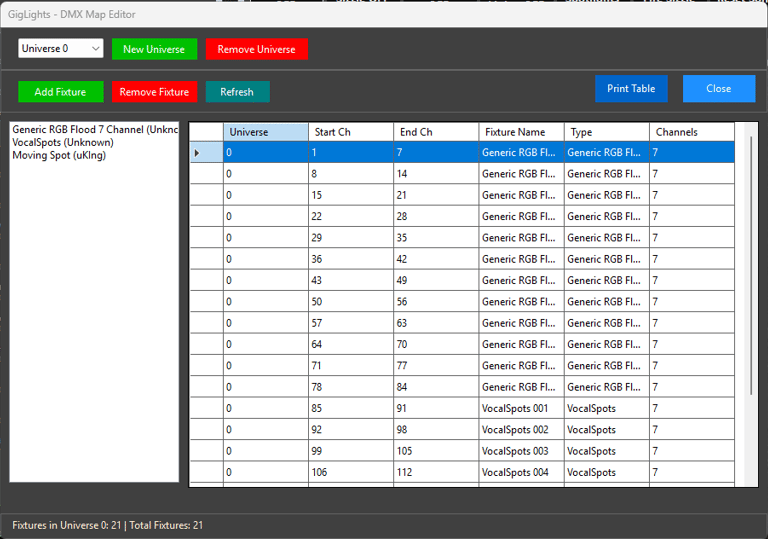
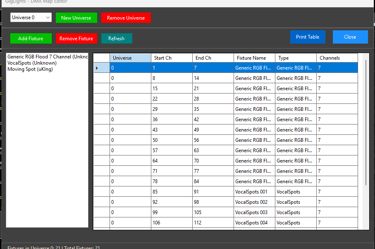
Above is the DMX Map Editor. Make sure you are on Universe 0 to start with. Select one of the fixture types you defined in step 2. Click "Add Fixture". This will bring up the following screen.
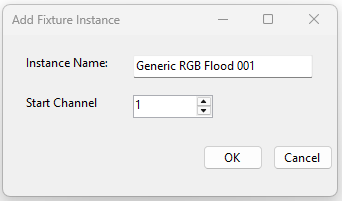
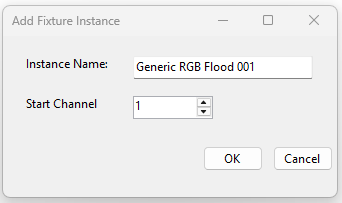
You will see it gave this entry an 001 after the fixture definition name. Each one you add will increment this number for each fixture you add. The start channels will be suggested for each fixture entered also. It knows what the next start number should be because it knows how many channels you entered into the fixture definition in the previous step. If you have 10 lights, you will do this 10 times. You're list will look something like this below....
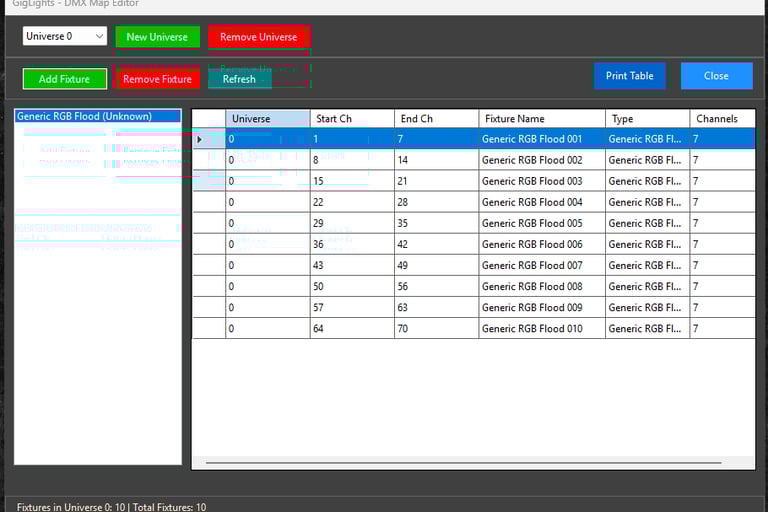
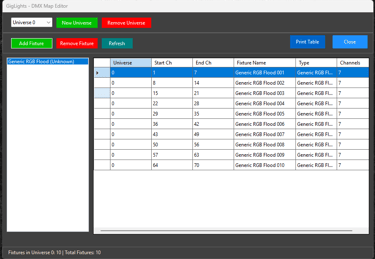
You now should have 10 (or however many fixtures you have) entries in the dmx table. Pay attention to the Start Ch. These are the numbers you will set your light's DMX addess to on your physical lights. If you have other fixtures to add, do them the same way as we created these.
Also notice the "Print Table" button. This allows you to print out the DMX Map so you can go to your physical lights and set the DMX addresses. Cool, huh? Now just click "Close" to exit the DMX Map.
!
Step 4. Run The Program Wizard
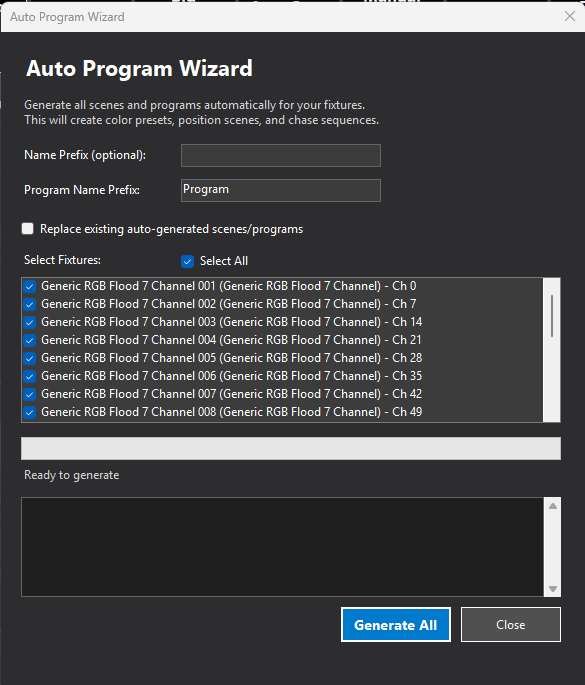
Now that GigLights knows what fixtures you have and where they are, it can create the initial programs and scenes for you that will be used in the auto program/auto show. This one feature will save you hours and hours of time. Let's start by bringing up the PROGRAM WIZARD under the Tools menu.
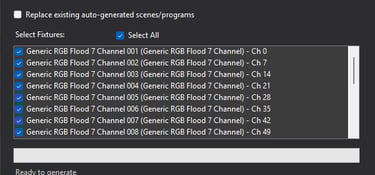
Uncheck all of the fixtures that you DON't Want auto programs created for. This would be likre Vocal Spots that are handled separately. You don't need to enter anything else. Once you click the "Generate All" button, tons of scenes and programs will be created for your particular lights. You will have saved tons of time with this one feature alone in GigLights compared to any other Lighting Software. Click the"Generate All" button now.
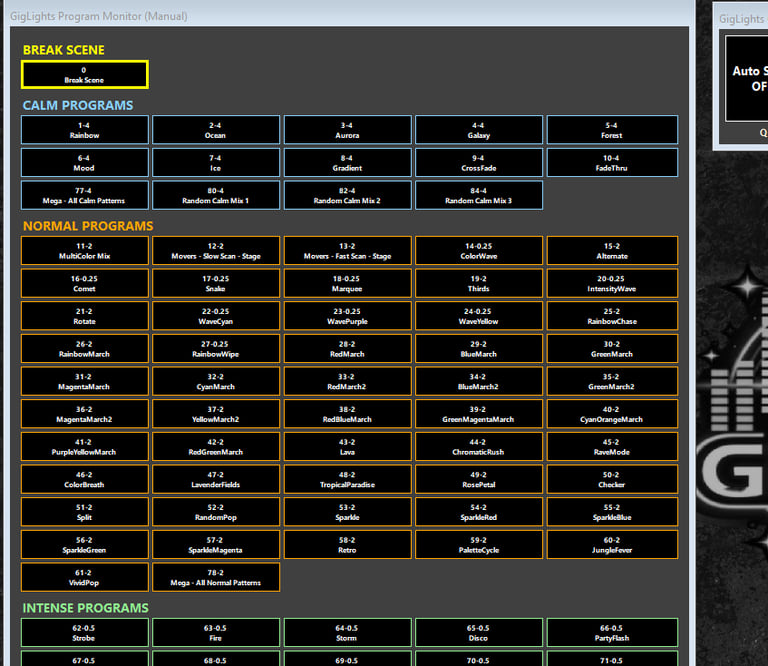
You just saved days worth of work. Pat yourself on the back. You will notice you now have a bunch of Auto Program buttons in the left Panel. These are the "Programs" that will be used in the Auto Show mode. You might want to drag the size of the Auto Program Button's Panel so all of the buttons show properly. If you delete a Program, it will remove the asscociated Auto Program button from the panel. You can also hide them one at a time in the program manager by unchecking the "Show" box to the right on each line of each chase listed. If a program is hidden (show unchecked), it won't be used by the Auto Show function. This is an easy way to remove Programs from the panel. You can click "Close" to exit the program manager.
Step 6. Connect DMX Controller
The last major step is connecting up to your DMX controller. If you haven't plugged it into the computer before we started, you should connect it now and restart GigLights. Once it is connected and Giglights is restarted, click the DMX Connection button...
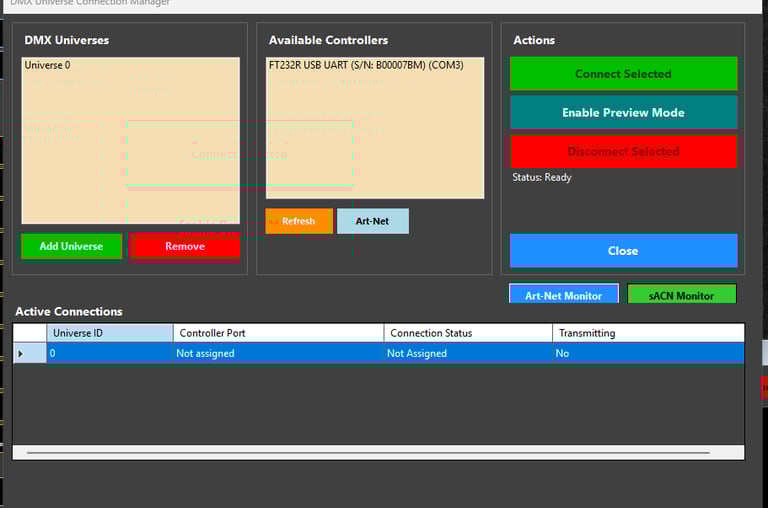
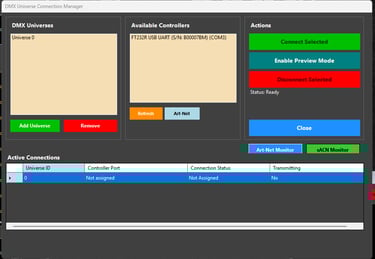
The DMX Connection manager is where you will connect to your DMX Controller. If you are using a USB style DMX adapter, it should show up in the "Available Controllers" list. If it's not there and it's a USB controller, GigLights probably don't support it yet. Check and see if it's on my list of supported ontrollers. If it is listed, select it. The select "Universe 0" for your first universe. Click the "Connect Selected" and you should see a connection message in the "Active Connections" section. If Transmitting says "Yes", you are good to go. You are ready to fly. If using Art-Net or E1.31, see the detailed instructions.
You can run in preview mode by clicking the "Enable Preview Mode" button. This allows you to run and test using the Fixture Rig Viewer to view your simulated light rig (which we can create next) without having an actual DMX Controller attached.
You can setup the Fixture Rig Viewer if you like so you can see how the lights look in a simulated environment. It just takes minutes to setup. If you want to use it, just click the "Fixture Rig Viewer" button...
Congratulations! You are setup mostly


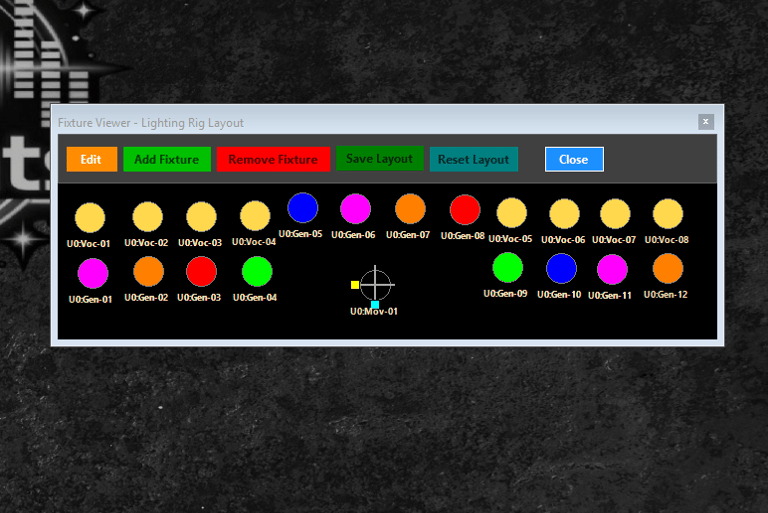
Above is the Fixture Rig Viewer. I would drag it to the lower right corner area if I was you. Here you can add your lights in the configuration you would have them on your stage. Just click the "Edit" button to start. Then click "Add Fixture". It will allow you to select a fixture to place on the black area. You can choose circle or square. I moveable light will have extra bars for the position. Drag the newly added light to where it would be in your lighting rig setup. You can make the area bigger and taller by dragging the border. Once you have all of your lights added and positioned, click "Save Layout".
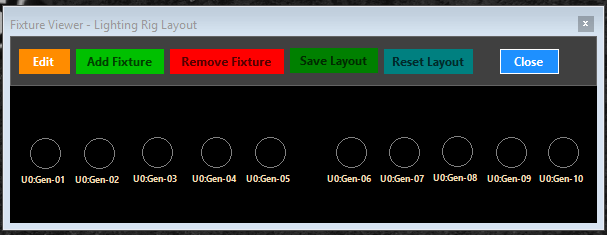

Above is the fixture rig viewer with the 10 new fixtures I added. These will lightup just like you actual fixtures when real DMX values are sent out to your fixtures (even in Preview Mode). The example below shows the Fixture Rig Viewer in action with more fixtures while the Auto Show is running...

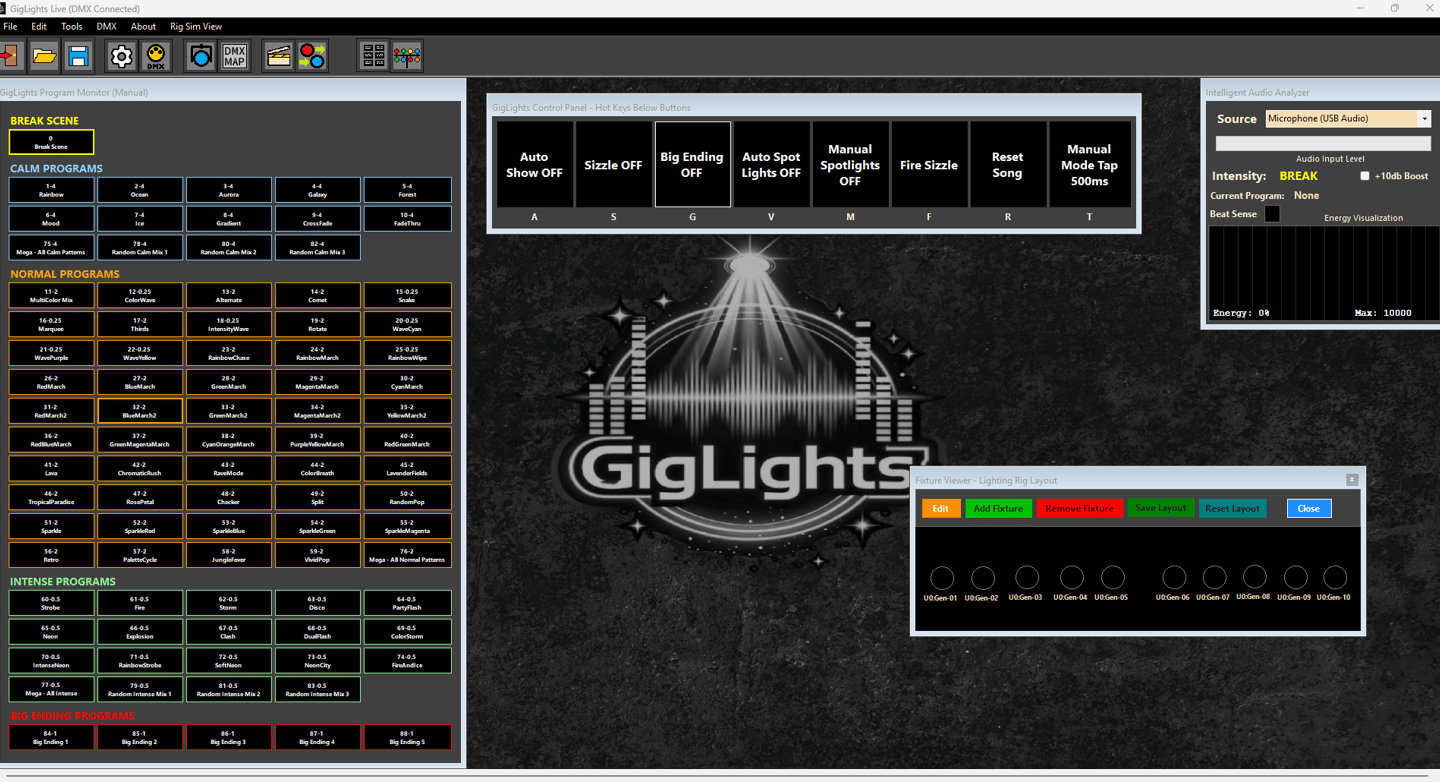
Your GigLights should look something like the image below,... depending on how many fixtures and types you added to GigLights at the start of this.
Now For The Fun Part - Let's Go
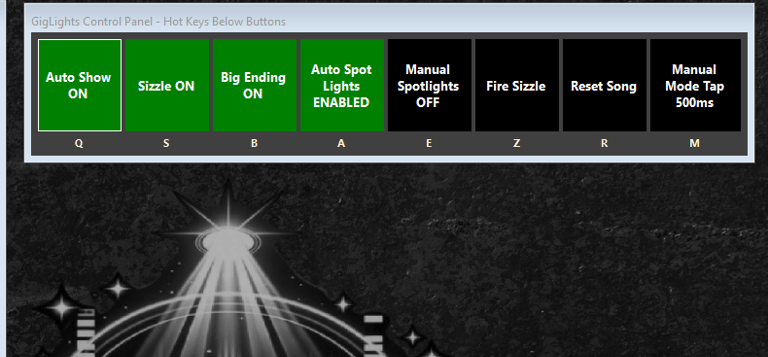
If you have a DMX controller connected and transmitting or you are in Preview Mode, you can now click any program button and your lights (and/or Fixture Rig Viewer) will light up. You are in "Manual Mode" right now. This means any button you click will light-up and run that program. The tap button runs most of these as far as speed of the chase.
Now, if you have a microphone connected with a usb adapter or use your laptop or computers microphone, hit the "Auto Show" button on the control panel. You will now be in "Auto Show" Mode. Play some music with a fair amount of volume that can be picked up by the microphone. If having issues getting enough volume, make sure the +10db box is checked in the Intelligent Audio Analyzer Box on your screen. GigLights will now begin to select the program buttons automatically based on the energy of your music. Let the magic begin!

You are now up and running if your lights (or Simulator) lit up. Congratulations. Now it's time to read the detailed instructions to be able to do so much more and control the "special stuff" lie editing scenes and programs or creating your own. Please read the GigLights Manual even of you do not plan on using everything GigLights has to offer. Many questions can be answered just by reading the manual.
The detailed opertaional manual for GigLights is online and lives here... GigLights Manual.
Copyright (c) 2025 GigLights.com